
Supplies Needed:
scrapkit: I used "Spring Ah Ling" by
SassyCee which can be purchased HERE
tube of choice: I used "Natural Beauty"
by Popeye Wong which can be
downloaded HERE
font: I used Chick by Fontalicious
which can be downloaded HERE
Animation Shop
_____________________________
Let's get started!
1. Open a 600 x 600 white canvas.
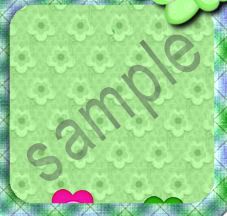
2. Copy and paste "frame 2", place in
middle of tag, and duplicate.
Using your magic wand, select the
inside of the top frame on both sides,
expand by 4, invert, copy and paste
"paper 6", press delete, and select none.
Make sure that this paper layer is below
your bottom frame layer.
3. Copy and paste tube and place
between your two frame layers on the
left side.
Erase any part of the tube that you
don't want showing outside of your
frames.
Make your top frame layer active and
erase any part of the frame where you
want your tube to show through.
Merge the three layers together.
4. Copy and paste "butterfly 3", resize
25%, free rotate right 35, add
dropshadow, and place on the top right
corner of your tag.
5. Copy and paste "doodle flower",
resize 50%, duplicate twice, and place
across the top of the frame.
Erase any part that shows inside the
frame.
6. Using "flower rac 1" and "flower rac
2" (resized 35%) duplicated as many
time as you need, make layers showing
the flowers going from this.....
to this.....
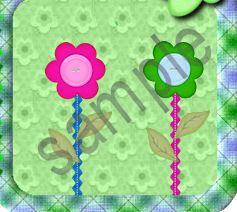
Number your layers from "1" up (I used 9).
Hide all flower layers.
7. Open your colour palette.
Set your forground to the darker green
and your background to the lighter blue.
Using your text tool set to Chick 72
stroke width 2, add desired text, convert
to raster layer, add dropshadow, and
place under your frame.
8. Add copyright and watermark.
Resize all layers 80%.
9. In PSP.....
edit > copy special > copy merged
10. In AS.....
edit > paste > as new animation
11. In PSP.....
Make "1" visible.
edit > copy special > copy merged
12. In AS.....
edit > paste > after current frame
13. In PSP.....
Hide "1" and make "2" visible.
edit > copy special > copy merged
14. In AS.....
edit > paste > after current frame
15. Follow the same as above until all of
your flower layers have been copied
over.
16. In AS.....
edit > select all
animation > frame properties (set to 15)
Select the last frame, go back to frame
properties, and set it to 160.
Save and you're finished!
______________________________________
tutorial ©Lynnca March 2009
No reproductions in part or in whole are allowed.
You can use my tutorials for challenges
as long as you provide the link only.

No comments:
Post a Comment