Tuesday, April 21, 2009

Butterfly Ballerina

Supplies Needed
scrapkit: I used "Madame Butterfly"
by Perfect Posers
tube of choice: I used one of the
beautiful 2 posers that come
with the scrapkit

____________________________

Let's get started!


1. Open a 600 x 600 transparent canvas.

selections > select all

Copy and paste "bp26" into selection.

selections > select none


2. Copy and paste "bp11", resize 10%, duplicate as many times as you need to make the top half of a circle shaped frame, merge flowers together, duplicate, flip, merge two frame halves together, add dropshadow, and duplicate the finished frame.


3. Copy and paste "bp22", resize 35%, and place between the two frame layers.


4. Erase any part of the tube that you don't want showing outside of the frame.

Make the top frame layer active and erase any parts where you would like the tube to show through.

Add a light dropshadow to the tube layer.


5. Copy and paste "bp10", resize 20%, place in bottom right corner, duplicate, mirror, add light dropshadow to both.


6. Copy and paste "bp15", resize 30%, place on left side of frame at the middle, duplicate, mirror, and add dropshadow to both.


7. Copy and paste "bp15" again, resize 20%, place on left side of frame above and a little to the right of the first one, duplicate, mirror, and add dropshadow.

Duplicate this finished layer and place below the original butterflies.


8. Set foreground to null and background to white.


9. Using your text tool set to Edwardian Script 48, add text, convert to raster layer, add dropshadow, and place between flowers at the bottom of your tag.


10. Add copyright and watermark.Resize all layers 80%.Save and you're finished!

____________________________

tutorial ©Lynnca April 2009
No reproductions in part or in whole are allowed.
You can use my tutorials for challenges
as long as you provide the link only.

Tuesday, April 7, 2009

Peace


Supplies Needed

scrapkit: I used ptu kit "Groovylicious"
by Creative Intentionz

tubes of choice: I used two that come
with the scrapkit that I used.

mask: I used ftu "mask 95"
by Weescotslass (go to navigate
then downloads)

___________________________

Let's get started!

1. Open a 600 x 600 white canvas.
Open mask and minimize.

2. Add a new raster layer, selections >
select all, copy and paste "paper 7" into
selection, and selections > select none.

3. layers > new mask layer > from image
layers > merge > merge group

4. Copy and paste "clipart 13",
resize 70%, add dropshadow,
and place in middle of tag.

5. Copy and paste "clipart 11",
resize 60%, add dropshadow,
and place in bottom right
corner of tag.


6. Copy and paste "clipart 9",
resize 60%, mirror, add dropshadow,
place in bottom left corner of tag.

7. Set foreground to black and
to null.
Using your preset shapes, add a
circle the same size as the inner circle
of the masked layer.
Add a new raster layer.

8. Set foreground to 95f20e and
background to #fb5a23.
Using your text tool set to Impact 48
stroke width 4, bring your cursor
down to the top of your preset
shape and add your text.
Convert to raster layer and
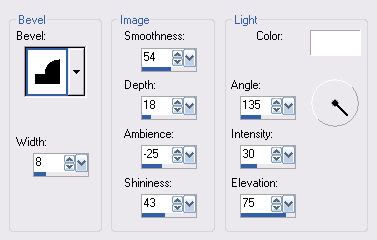
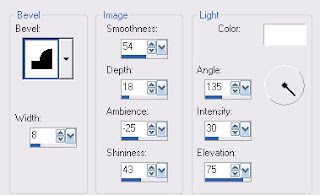
add inner bevel.....


Add dropshadow of choice.
Hide layer with your preset shape.

9. Copy and paste "butterfly 3", resize 40%,
place on the left corner of the first
letter of your text, duplicate, mirror,
and place on the right corner
of the last letter of your text.

10. Add copyright and watermark.
Resize all layers 80%.
Save and you're finished!
___________________________

tutorial ©Lynnca April 2009
No reproductions in part or in whole are allowed.
You can use my tutorials for challenges
as long as you provide the link only.
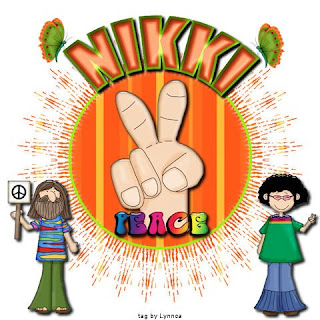
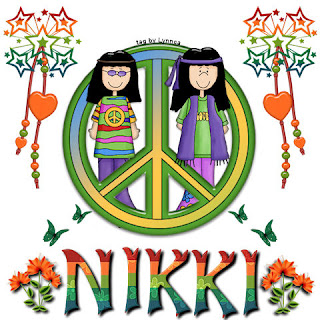
Groovy Man..... Groovy


Supplies Needed

scrapkit: I used ptu kit "Groovylicious" by
Creative Intentionz
tubes of choice: I used two that come with
the scrapkit that I used.
_____________________________

Let's get started!

1. Open a 600 x 600 white canvas.

2. Copy and paste "clipart 4", resize 125%,
place in middle of tag, and duplicate.

3. Copy and paste "clipart 10", resize 80%,
and place on the right side of the peace
sign, between the two peace sign layers.

4. Copy and paste "clipart 8", and follow the
same instructions as above but place on
the left side.

5. Erase any parts of the tubes that you
don't want showing outside of the peace
sign.
Make the top peace sign your active layer
and erase any part where you want the
tubes to show through.

6. Copy and paste "flower 7", resize 25%,
place in the bottom left corner of tag, add
dropshadow, duplicate, and mirror.

7. Using the alpha provided with the kit,
spell out desired text, place at bottom of tag,
and add dropshadow.

8. Copy and paste "stars 6", resize 60%, and
place in top right corner of tag.

9. Copy and paste "bead string 1", resize
40%, place under the very middle star in the
group of stars, erase any part of the staples
that show from underneath the star, merge
the two together, duplicate, and mirror.

10. Copy and paste "butterfly 9", resize
20%, place above the first letter of your text,
duplicate, and mirror.
Merge the two butterflies together,
duplicate, and resize 75%.

11. Add copyright and watermark.
Resize all layers 80%.
Save and you're finished!

__________________________________
tutorial ©Lynnca April 2009
No reproductions in part or in whole are allowed.
You can use my tutorials for challenges
as long as you provide the link only.
Monday, April 6, 2009

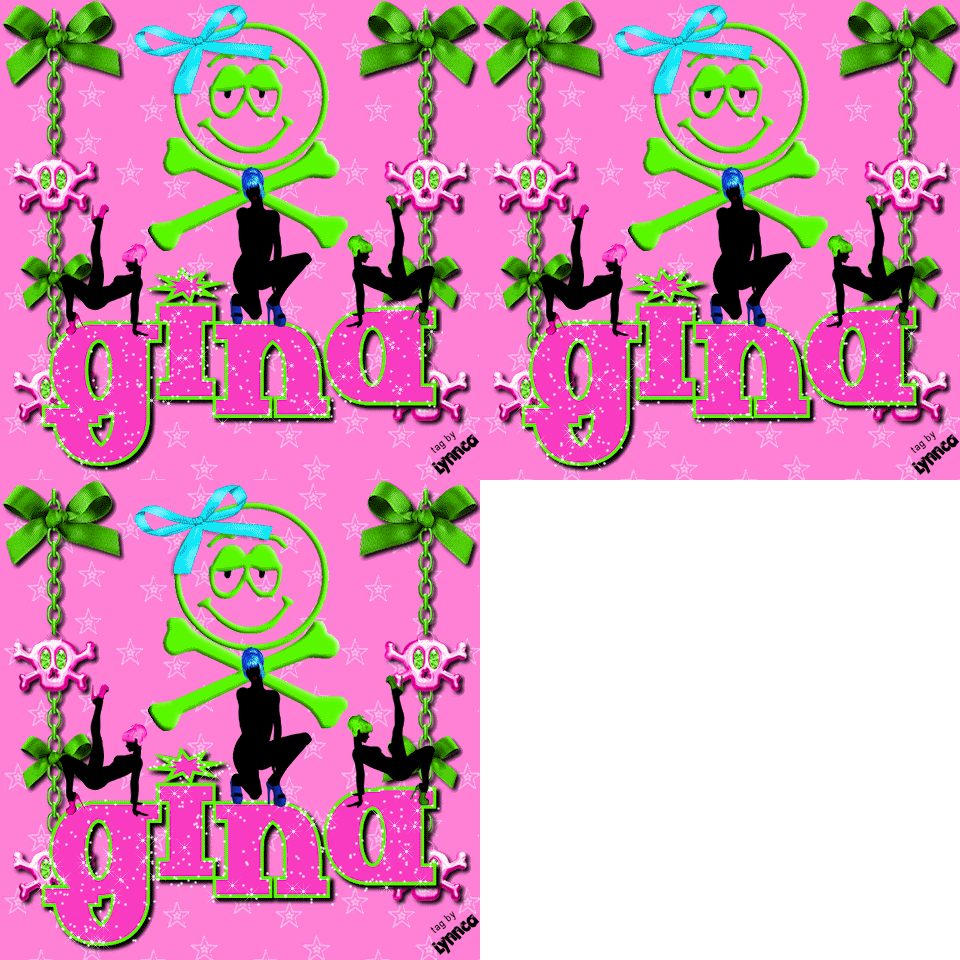
Ladies Night

Photobucket
Supplies Needed

scrapkit: I used ptu "
Rave Craze"
by Kikeka Kits

tube of choice: The tube I used
came with the scrap kit

font: I used ftu
Senor Pooglins
_________________________
Let's get started!

1. Open a 600 x 600 transparent canvas.
selections > select all
Copy and paste "paper 15" into selection.
selections > select none

2. Set foreground to #5cf800 and
background to #f83cc0.
Using your text tool set to Senor Pooglins
100 stroke width 4, add desired text,
convert to raster layer, add dropshadow,
and place toward the bottom of your tag.

3. Copy and paste "girl 1", resize 35%, and
place on the first letter of your text.

4. Copy and paste "girl 3", resize 35%, and
place on the last letter of your text.

5. Copy and paste "girl 2", resize 50%, and
place in top of the middle letter of your text.

6. Copy and paste "dangle 3", resize 75%,
place on left side of tag, duplicate, mirror,
and add dropshadow to both.

7. Copy and paste "skull", resize 80%, and
place behind "girl 2".

8. Go back to your text, duplicate twice,
rename "1", "2", and "3".
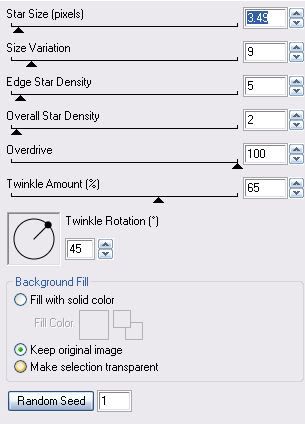
Apply constellation with the following
settings to each layer, remembering to
click on "random seed" each time....
Photobucket
Hide "2" and "3".

9. Add watermark and copyright.
Resize all layers by 80%.

10. In PSP.....
edit > copy special > copy merged

11. In AS.....
edit > paste > as new animation

12. In PSP.....
Hide "1" and make "2" visible.
edit > copy special > copy merged

13. In AS.....
edit > paste > after current frame

14. In PSP.....
Hide "2" and make "3" visible.
edit > copy special > copy merged

15. In AS.....
edit > paste > after current frame
edit > select all
animation > frame properties (set to 15)

16. Save and you're finished!
_________________________

tutorial ©Lynnca April 2009
No reproductions in part or in whole are allowed.
You can use my tutorials for challenges
as long as you provide the link only.
Neon Craze

Photobucket

Supplies Needed
scrapkit: I used ptu "Rave Craze"
by Kikeka Kits

tube of choice: The tube I used
came with the scrap kit

font: I used ftu Senor Pooglins

_________________________


Let's get started!

1. Open a 600 x 600 white canvas.

2. Copy and paste "frame 2", resize 75%,
place in middle of tag and duplicate.

3. Copy and paste "girl 3", place
between the two frame layers,
erase any part of the tube that you
do not want showing outside of your frame,
make the frame layer active, and
erase any part of your frame
where you want your tube to show through.

4. Copy and paste "butterfly 3",
resize 15%, duplicate twice,
free rotate one of them right 30,
free rotate left 30, add dropshadow,
and place where desired.

5. Copy and paste "dangle curtain 2",
resize 25%, duplicate twice.
Free rotate one right 30, another left 30,
and place them so that all 3
stars are on top of each other.
Rename them "1" (the one rotated right),
"2" (the original one), and "3"
(the one rotated left).
Hide "2" and "3".

6. Copy and paste "heart 3", resize 25%,
free rotate right 20, add dropshadow,
place in the top right corner of
your tag, duplicate, and mirror.

7. Set foreground to #5cf800 and
background to #f83cc0.
Using your text tool set to
Senor Pooglins 48 stroke width 2,
add desired text, convert to raster layer, add
dropshadow, and place where desired.

8. Add copyright and watermark.
Resize all layers 80%.

9. In PSP.....
edit > copy special > copy merged

10. In AS.....
edit > paste > as new animation

11. In PSP.....
Hide "1" and make "2" visible.
edit > copy special > copy merged

12. In AS.....
edit > paste > after current frame

13. In PSP.....
Hide "2" and make "3" visible.
edit > copy special > copy merged

14. In AS.....
edit > paste > after current frame

15. In PSP.....
Hide "3" and make "2" visible.
edit > copy special > copy merged

16. In AS.....
edit > paste > after current frame
edit > select all
animation > frame properties (set to 20)

17. Save and you're finished!


_________________________

tutorial ©Lynnca April 2009
No reproductions in part or in whole are allowed.
You can use my tutorials for challenges
as long as you provide the link only.
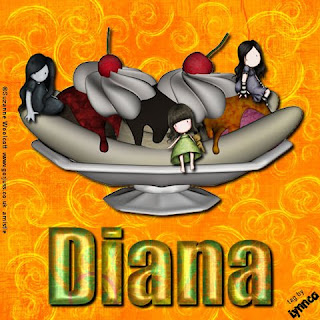
Wednesday, April 1, 2009

Sunday


Supplies Needed:

scrapkit: I used "Sunday Treats"
by Dream Effectz

tubes of choice: I used 3 tubes
______________________________

Let's get started!

1. Open a 600 x 600 white canvas.
selections > select all
Open "paper 2" and paste into selection.
selections > select none

2. Copy and paste "sunday", resize 20%,
add dropshadow, and place in
middle of tag.

3. Copy and paste your tubes,
resize if needed, add dropshadows,
and place where desired
(or you can use my tag as a reference).

4. Set foreground to null and
background to pattern scale 50
using "paper 3".
Using your text tool set to
Impact 72, add desired text,
convert to raster layer,
and apply inner bevel.....
Photobucket
Apply dropshadow and place
where desired.

5. Add copyright and watermark.
Resize all layers 80%.
Save and you're finished!
______________________________
tutorial ©Lynnca April 2009
No reproductions in part or in whole are allowed.
You can use my tutorials for challenges
as long as you provide the link only.